
Godot: Dive into Shaders
Shaders in the context of graphics programming have always fascinated me. They're used both in video games and in movies. With further digitalization and the rise of XR, this technology is becoming ever more important. I still haven't really understood them. Writing my own shaders even less so.
For this post, I decided to tackle this and learn more about shaders. As my development environment, I chose the open-source engine Godot.
What are shaders?
Shader is an umbrella term for programs that run on the graphics card. In our context, we're talking about using shaders to change the appearance, shape, and color of objects in 2D or 3D space. They can make grass sway in the wind, bring an ocean to life, or simulate footprints in the snow.
So why use shaders? They're fast — very fast. Graphics cards are optimized to perform many calculations in parallel. Why, for example, calculate the pixels of an image one after another when they're independent of one another anyway?
This fact — that, for instance, the color of multiple pixels is calculated in parallel, simultaneously — is why many developers initially struggle with writing shaders.
What makes shaders special?
Shading languages like the well-known OpenGL Shading Language (GLSL) clearly define how shaders are written, and that differs a bit from the approach used elsewhere in software development.
If we wanted to color an entire texture in an arbitrary color, for example, a familiar approach would be:
for x in range(width):
  for y in range(height):
    set_color(x, y, some_color)
But in the context of shaders, the code needs to be executable for every pixel in parallel. We're already inside a loop, so to speak. The correct way would be:
void fragment() {
  COLOR = some_color;
}
The graphics card calls the fragment() function for every pixel, exposing a variety of variables, including COLOR, to determine the color of the current pixel.
There are several such functions, and even more variables. The fragment() function is called for every pixel. vertex() for every vertex in a mesh, light() for every pixel and every light source. This list varies slightly depending on which shading language and which development environment you use.
In the case of Godot there are a few more functions, which aren't important for now. I'll limit myself to fragment() and vertex() for the moment.
A first attempt
For the first shader we'll use a simple, two-dimensional texture — here the logo of the Godot Game Engine. Let's now apply the example from the previous section. We want to color the entire texture in an arbitrary color.
void fragment(){
  COLOR = vec4(0.4, 0.6, 0.9, 1.0);
}
This shader tints our texture a soft blue. The built-in variable COLOR is overwritten with a vec4, which holds the rgba values (between 0.0 and 1.0) for the corresponding color. This means every pixel is assigned this color.
Now how would you create a gradient? For a gradient we'd need information about which pixel on the texture the fragment() function is being executed for, since the code otherwise stays the same for every pixel.
For this purpose there's the UV variable. The so-called UV coordinates are formed by a vec2, which uses values between 0.0 and 1.0 to indicate the position we're at. 0.0 is at the top left and 1.1 at the bottom right of the texture.
Fortunately, GLSL is very tolerant when it comes to data types. So we can initialize a vec4 using two vec2s, or a mix thereof. The compiler takes care of the rest.
void fragment() {
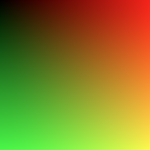
  COLOR = vec4(UV, 0.5, 1.0);
}
This shader makes sure that, depending on the UV coordinate, the values for the red and green color channels of the vec4 change. The further right a pixel lies, the closer u gets to 1.0, and thus to a bright red. The same applies to v. At the bottom left, where UV == vec2(1,1), the pixels are colored yellow.
Movement
Today we'll turn to the vertex() function of our shader. As a reminder: this function is executed for every vertex of a mesh. Since we're currently only dealing with a 2D texture, that means the four corner points of the texture — the function is called for each of the four vertices.
void vertex() {
  VERTEX += vec2(10.0, 0.0);
}
This vertex shader would shift every vertex by 10 units on the x axis. As a result, our texture would render further to the right. Important: the position of the texture — for example for collision calculations or similar — does not change.
To make the whole example a bit more dynamic, we'll make our texture move in a circle. Movement requires time, which we can access via the built-in variable TIME. Roughly explained: TIME describes the time in seconds since the application started. We can use this variable as a parameter for sine and cosine functions, which are also available to us.
void vertex() {
  VERTEX += vec2(cos(TIME) * 100.0, sin(TIME) * 100.0);
}sin() and cos() return values between 0.0 and 1.0, which is quite hard to actually see. That's why we multiply the values by a constant to make the movement more visible — the radius, so to speak.
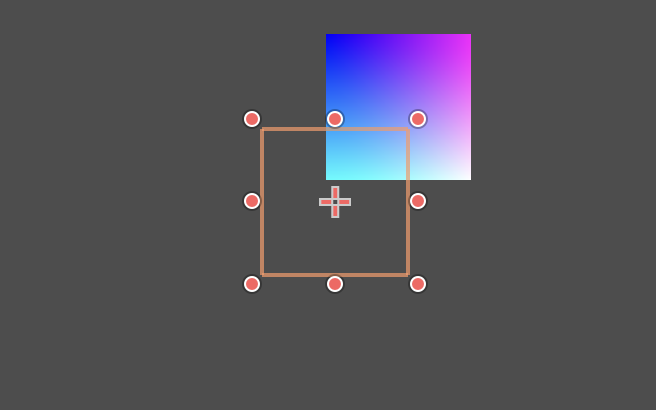
Let's round the whole thing off by letting us determine, from outside the shader, how large this radius should be.
uniform float radius = 100.0;

void vertex() {
    VERTEX += vec2(cos(TIME) * radius, sin(TIME) * radius);
}
We define a uniform variable, which we can change via our codebase, or in the case of Godot, also via the GUI.
So now we're able to modify vertices of our texture too! But two dimensions get a little boring after a while.
The third dimension
Our goal is to warp a plane into the third dimension. For that we naturally use the vertex() function again. The problem is that our plane so far has only been defined by four vertices.
Little freedom for elaborate shapes. So for our experiment we'll use a plane with 32 subdivisions. That gives us nearly 1,500 vertices to work with.
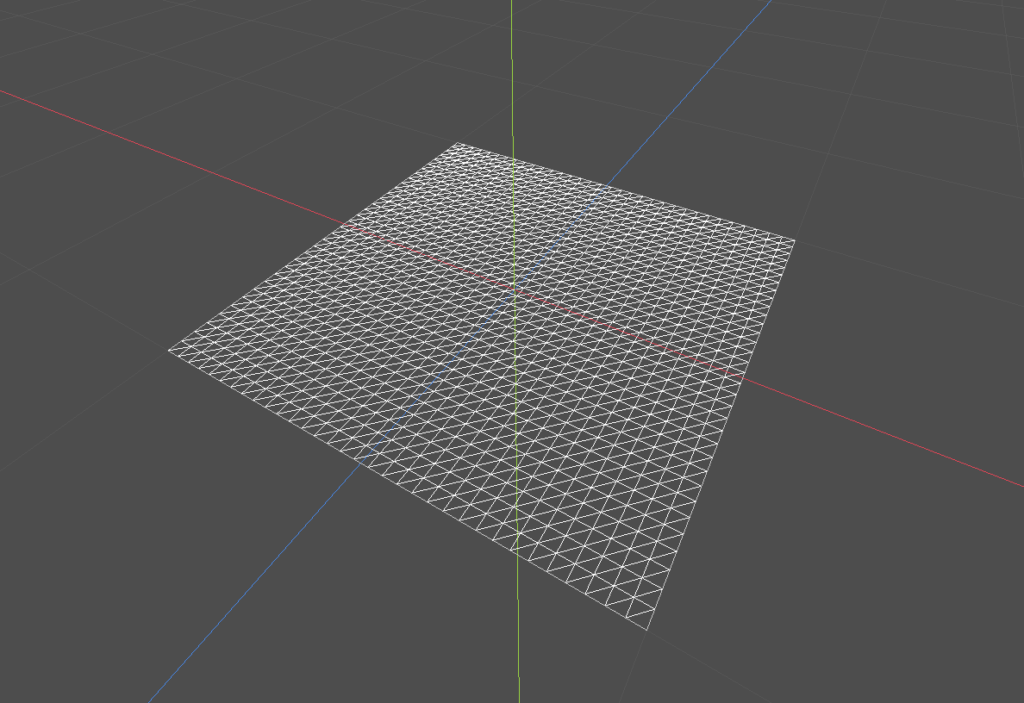
void vertex() {
    VERTEX.y += cos(VERTEX.x);
}
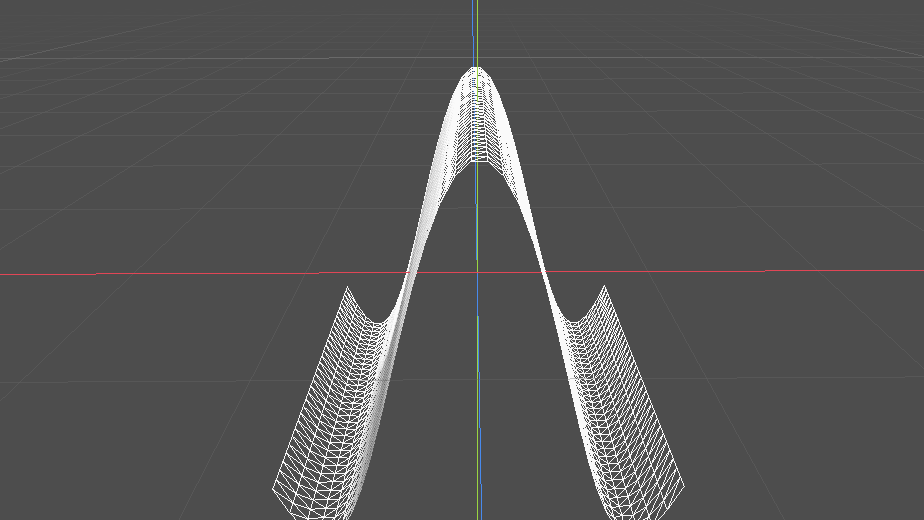
In this case we modify the y coordinate for every vertex, shifting it up or down. We again use the cos() function, which gives us values between 0.0 and 1.0 in a wave-like pattern.
As a parameter we take the x coordinate of the same vertex. This bends the plane along the x axis, with a peak at coordinate (0,0). But we don't see a complete wave.
That's because the current x values of our vertices lie between -1.0 and 1.0. Our square plane sits at the origin (0,0) with a side length of 1.0. If we multiply in a constant, the wave-like nature of the cosine function becomes visible.
void vertex() {
    VERTEX.y += cos(VERTEX.x * 4.0);
}
The same works if we use the z axis as a parameter — this time the plane bends along the z axis. It gets interesting when we multiply both values together.
void vertex() {
    VERTEX.y += cos(VERTEX.x * 4.0) * cos(VERTEX.z * 4.0);
}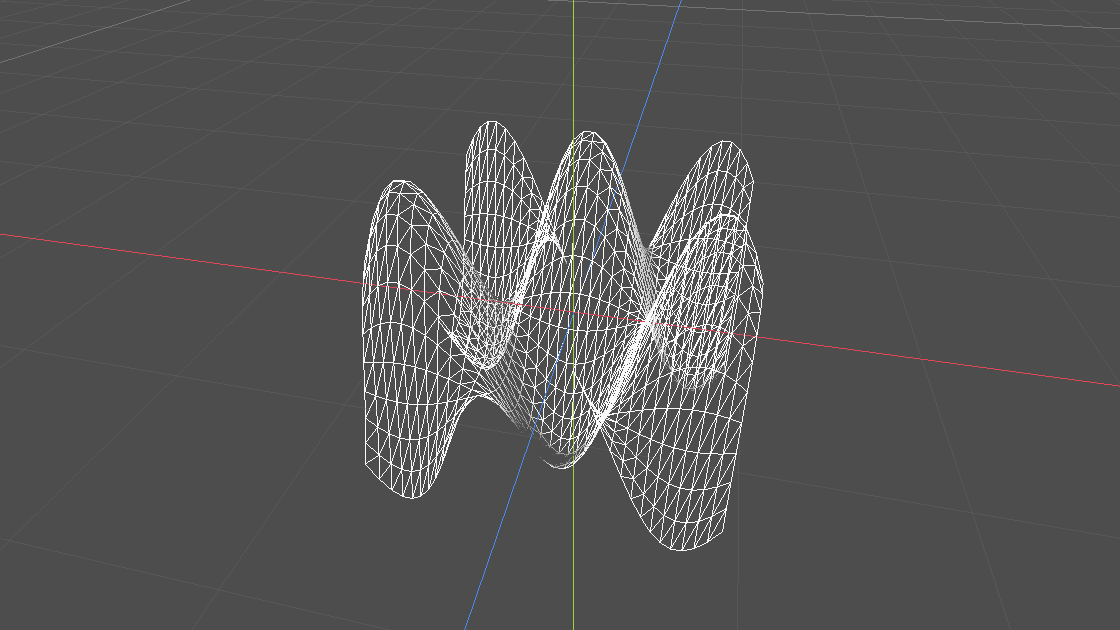
In this case, we get a very regular hill landscape — five hills, to be exact. The results of both cos() functions are essentially blended together. The two bends along the x axis and the y axis are combined.
So far so good! We've turned a boring plane into a three-dimensional shape using just a few lines of code.
Harnessing chaos
At this point some of you may already see where this is going. Using a single line of code, we managed to create a relatively complex shape and modify it with just a few parameters. Executed on the graphics card — in a fraction of a second. There's a lot of potential here.
So we can shift the height of our vertices using the shader. To make things a bit more exciting, we need values, ideally between 0.0 and 1.0, that are as random as possible while still being evenly distributed. The answer to this search is: noise texture.
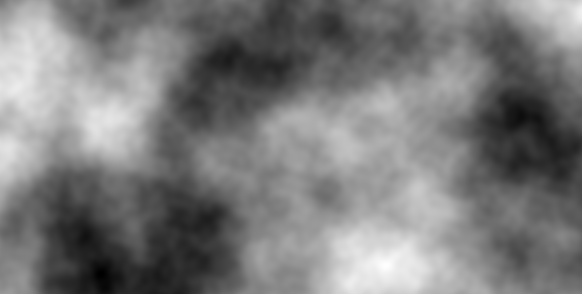
A noise texture gives us, for every pixel, a brightness value between 0.0 and 1.0, which we can use as a parameter for the height information of the vertices.
uniform sampler2D noise;

void vertex() {
    float height = texture(noise, VERTEX.xz).r;
    VERTEX.y += height;
}
In Godot, such a noise texture can be generated easily. Using a uniform, we can define it as a parameter in the shader. We then use texture() to read the value of the red color channel of the texture based on the x and z value of the vertex. Why red? Noise textures are usually black and white, so all color channels have the same value. We could just as well use the green or blue color channel.
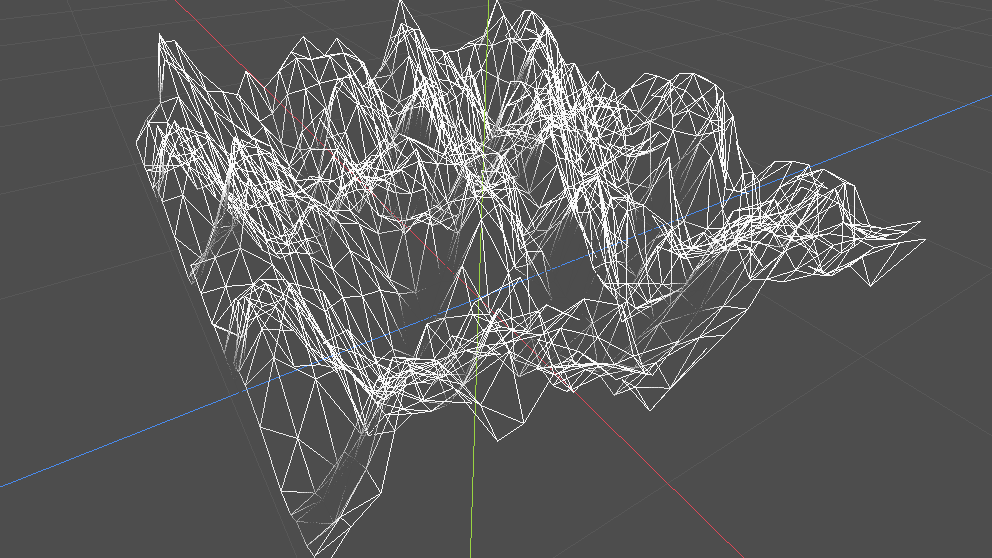
Now our mountains still look a bit too sharp and misshapen. Let's smooth them out by defining a scalar that reduces the high values a bit.
uniform sampler2D noise;
uniform float height_scale = 0.5;

void vertex() {
    float height = texture(noise, VERTEX.xz).x;
    VERTEX.y += height * height_scale;
}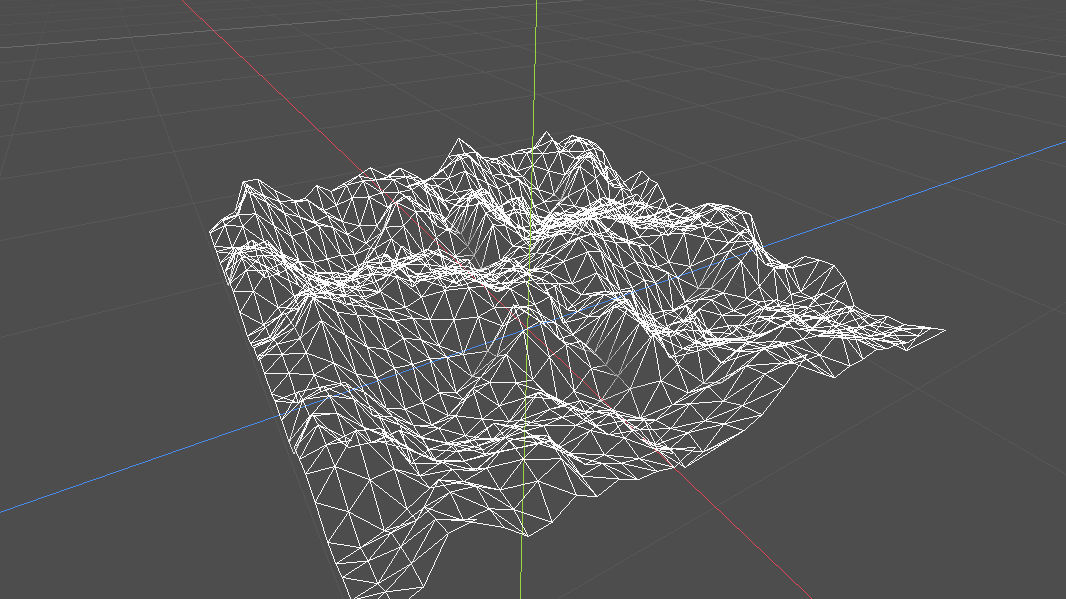
That already makes the mountains look a bit more realistic. With just a few steps, our plane turns into a realistic mountain landscape that we can control with a couple of sliders. Impressive!
Moving mountains
The wireframe view has so far only been useful for better understanding where vertices lie. If we now disable it again, we see that our mountain landscape casts no shadows at all. That's because, while we deformed the mesh, we never updated the NORMALS, which are necessary for shadow calculation.
If we placed a light in the middle of the landscape right now, no correct shadow calculation would take place.
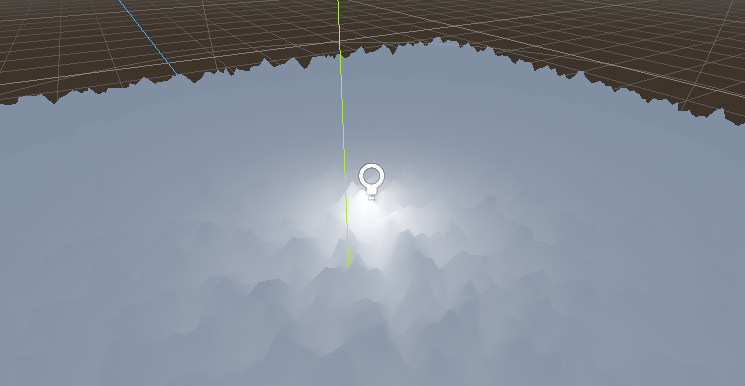
You can think of normals as the normal vectors of the individual faces of a mesh. These vectors are used, among other things, to determine how bright a face should be rendered. There's also a technique called a normal map, which encodes these vectors using color values in a two-dimensional texture.
In Godot it's relatively easy to use any noise texture as such a normal map. However, we'll use this normal map in fragment() and apply it per pixel, not just per vertex.
The question now is how we make sure that both vertex() and fragment() use the same position to read from their respective texture. The varying keyword lets us store variables across functions.
uniform float height_scale = 0.5;
uniform sampler2D noise;
uniform sampler2D normalmap;

varying vec2 tex_position;

void vertex() {
  tex_position = VERTEX.xz / 2.0 + 0.5;
  float height = texture(noise, tex_position).x;
  VERTEX.y += height * height_scale;
}

void fragment() {
  NORMAL_MAP = texture(normalmap, tex_position).xyz;
}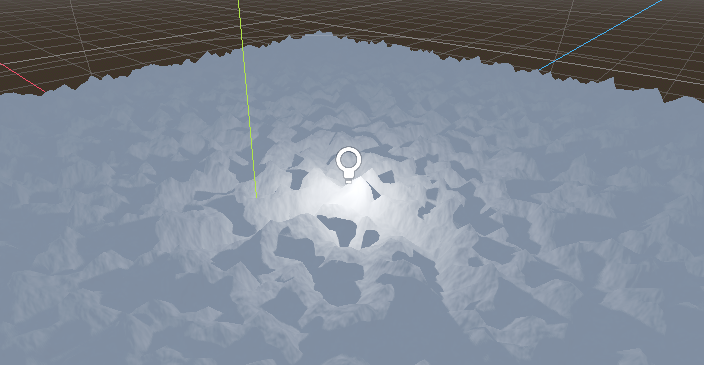
With just a few steps, we've created a mountain landscape that correctly reacts to light. The values can be adjusted freely. It would be possible to scale the plane larger to cover a bigger landscape, and potentially use it to dress a background as well.
Conclusion
After this little excursion, I've overcome my initial hesitation toward the topic of shaders. It showed me how powerful shaders are, but also that they require unconventional thinking to achieve certain effects.
Going forward I hope to learn more in this area. For now, I'll think twice before ruling out solving a graphical challenge with a shader.